End-of-day reconciliation is where your cash numbers either prove out or fall apart. It's the single process that connects what your register says happened to what's physically in the drawer – and most businesses treat it as a chore their closers rush through at the tail end of a long shift.
That's how variances go unlogged, discrepancies stack up without explanation, and nobody can trace where the money went when someone finally notices the totals don't add up three weeks later.
A repeatable reconciliation process – built around verified counts, printed documentation, and a consistent routine – turns closing from a nightly gamble into a system that produces defensible numbers every time.
Here’s how to manage cash efficiently, reduce mistakes, and protect every dollar in your drawer!
#1. What Cash Reconciliation Is (And Why It Matters)
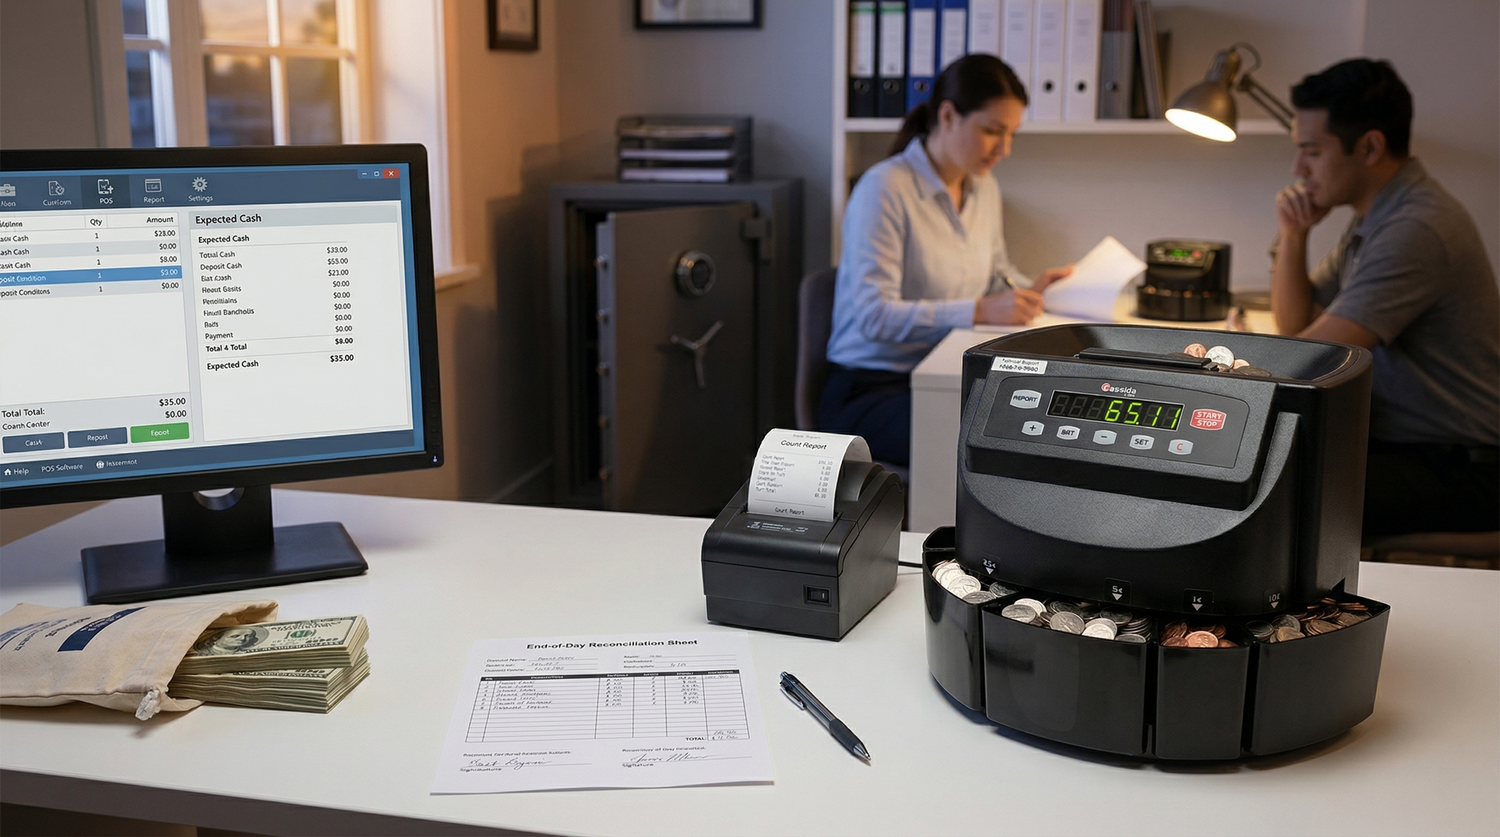
Cash reconciliation is a comparison between two numbers: the cash your POS system shows you should have in the drawer (the expected total) and the cash you actually count (the physical total).
The difference between those two numbers is your variance. A zero variance means the drawer balances perfectly. A positive variance means you have more cash than expected (overage). A negative variance means you have less (a shortage). Either direction means something happened during the shift that needs an explanation.
This isn't just bookkeeping. Reconciliation is your earliest signal for transaction errors, pricing issues, register mistakes, counterfeit bills, and theft. If you're not reconciling every register every night, you're operating in the dark until the problem becomes obvious - and by then, it's usually too late to trace.
#2. Before You Count: Set Up Your Closing Procedure
Reconciliation quality is determined before anyone touches a bill. The setup matters as much as the count.
Standardize starting drawer amounts. Every register should open every shift with the same predetermined cash amount - $200, $300, whatever fits your business. This gives you a known baseline. If the starting amount varies by register or by the person who opened, your closing math is unreliable before it even begins.
Pull the POS report first. Before you count a single bill, print or pull the expected cash total from your POS system. You need to know the target number before the count, not after. Counting first, then checking the POS, creates a temptation to "make it work" rather than to document the real variance.
Secure the environment. Count in a back office, break room, or any space with a locked door and camera coverage. Counting cash on the sales floor - or anywhere accessible to non-counting staff - introduces variables you can't control.
Use two people, always. Dual-custody counting means two unrelated employees are present for every count. One counts, the other observes and verifies. Both sign the reconciliation sheet. This deters theft and protects honest employees from false accusations.
Stage your tools. Have everything ready before starting: a bill counter, coin-sorting equipment, deposit bags, blank reconciliation sheets, and a pen. Hunting for supplies mid-count wastes time and breaks focus.
#3. Step-by-Step: Counting the Drawer
Once the register is closed out and the POS report is pulled, the physical count follows a specific sequence.
Remove the starting drawer amount first. Count out your standard opening amount and set it aside. This cash is returned to the register for tomorrow's opening. Everything else is what you're reconciling against the POS-expected total.
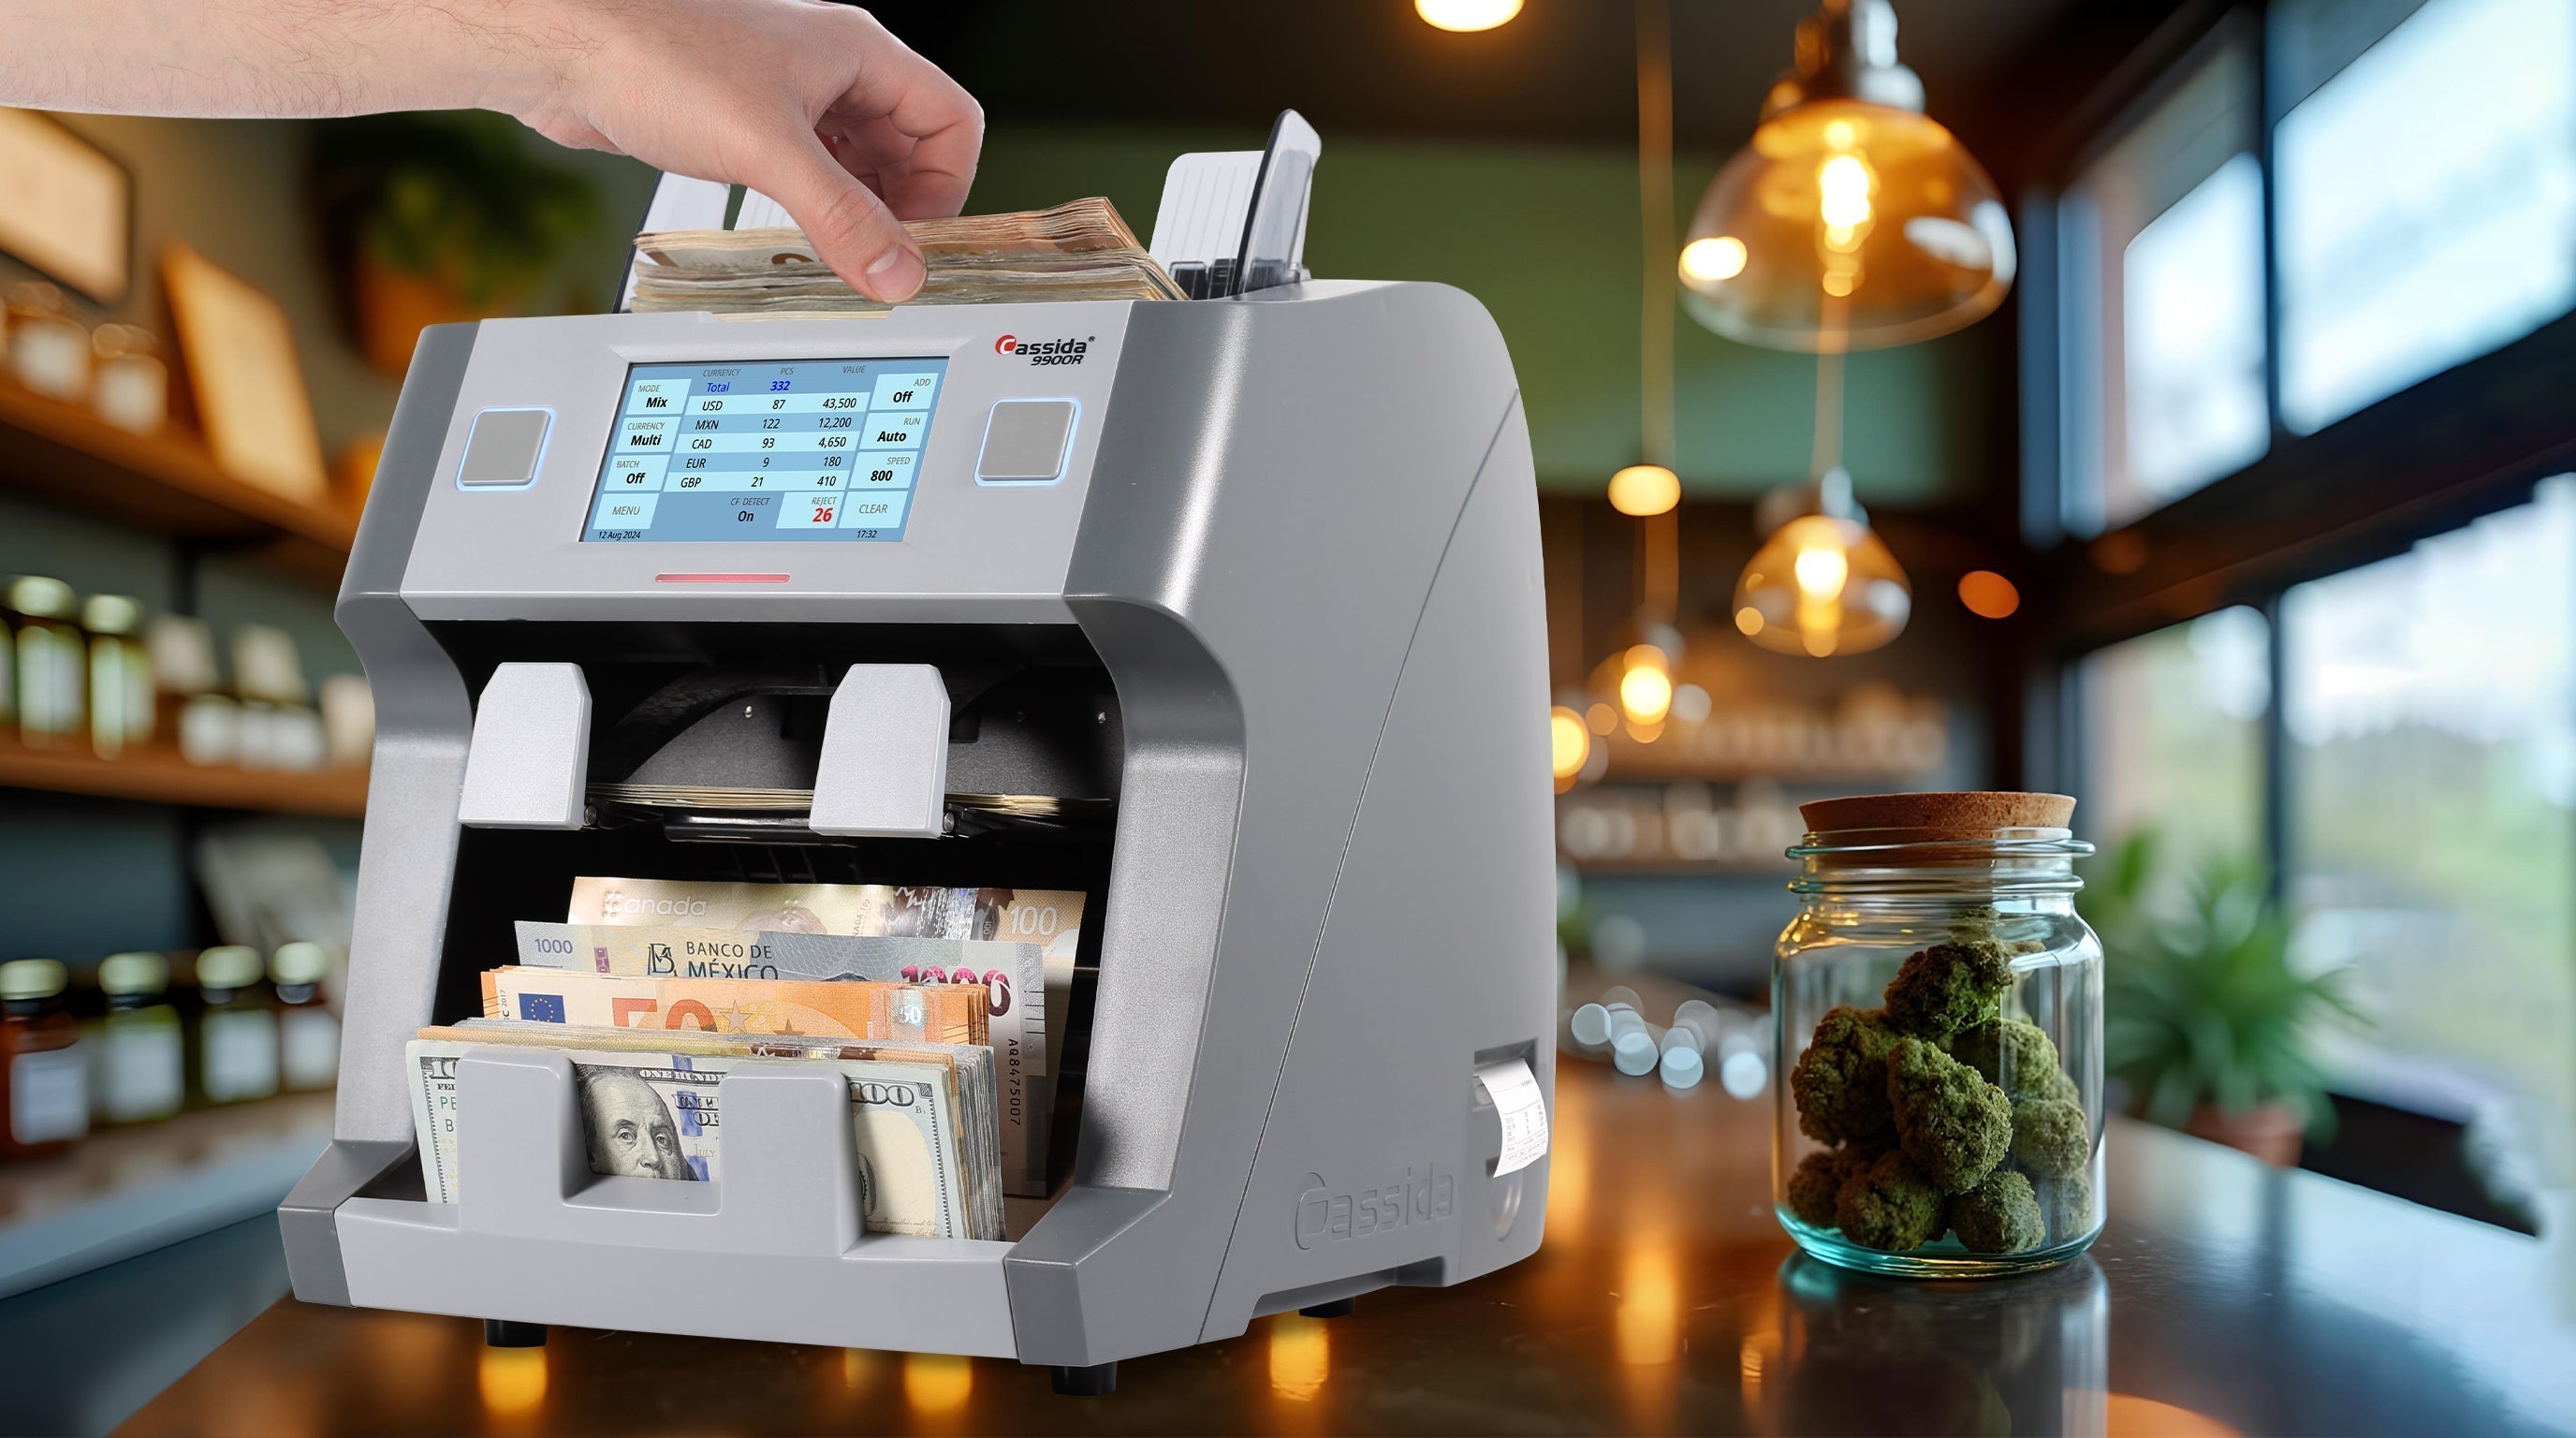
Count the bills. If your team sorts by denomination before counting, run each stack through the counter separately. ValuCount mode gives you both the bill count and the dollar total for each denomination. If your team counts unsorted drawers, the mixed-bill counter accepts the entire drawer as-is and returns a complete breakdown of denominations in a single pass.
Count the coins. For small coin volumes, hand-counting is fine. For businesses that accumulate meaningful coin totals - restaurants making change, laundromats, arcades - a coin counter and sorter saves time and eliminates the denomination-by-denomination manual sort.
Account for non-cash tenders. Checks, credit card batch totals, gift card redemptions, and any other non-cash payments recorded in the POS reduce the amount of physical cash you should expect in the drawer. Add these to your reconciliation sheet so the comparison is apples-to-apples.
Record the final counted total. Bills plus coins plus non-cash tenders equals your total reconciled amount. This is the number you compare to the POS-expected total.
#4. Reconciling: Compare, Document, Investigate
With the POS expected total and the counted total side by side, the math is simple: expected minus counted equals variance.
- Zero variance. The drawer balances. Document it (even a zero variance is worth recording) and move on to deposit prep.
-
Positive variance (overage). You have more cash than expected. This could mean a customer was overcharged, a refund was processed in the POS, but the cash was never returned, or a transaction was entered at the wrong amount. Overages aren't "good" - they indicate an error somewhere in the shift. Log the amount and note any possible explanation.
-
Negative variance (shortage). You have less cash than expected. This is the one that gets attention. Possible causes include a genuine miscount (recount before investigating further), an incorrectly entered transaction in the POS, a discount or void that wasn't recorded, a counterfeit bill that reduced the drawer's actual value, or theft. If you're hand-counting, start by running the cash through a bill counter to verify the total with machine accuracy, then escalate.
Document every variance regardless of size. Date, register number, shift, amount, direction (over or short), who counted, and any notes on possible cause. Small variances that seem harmless in isolation reveal patterns when tracked over time.
#5. Print the Receipt, Sign the Sheet
The printed count receipt from your bill counter serves as the anchor for your reconciliation documentation. It provides a machine-verified total, a denomination breakdown, and a timestamp that no handwritten note can replicate.
Attach that receipt to a reconciliation sheet that includes: the date, register number, starting drawer amount, POS expected total, counted total, variance amount and direction, non-cash tender totals, and the names and signatures of both counters.
This is the paper trail that ties your register activity to your physical cash to your bank deposit. Without it, you have a number someone wrote on a notepad, which proves nothing in an audit, a theft investigation, an employee dispute, or a bank inquiry.
The Cassida Cash Handling Printer pairs with most Cassida bill counters to generate these receipts automatically. Businesses that don't yet use a printer can photograph the counter's display after each count to create a more reliable record than a handwritten total.
#6. Prep the Deposit
With reconciliation complete and documented, the remaining cash gets prepped for the bank.
Sort and strap bills. If your counter has Batch mode, set it to standard strap quantities (typically 100 bills) and let the machine stop automatically at each bundle. This eliminates the need for manual counting during deposit prep. For mixed-denomination counters, the machine has already sorted by denomination – your bills come out organized and ready to strap.
Roll or bag coins. Follow your bank's requirements. Some accept loose coins with a verified count slip, while others require rolled coins. Coin counters with Batch mode stop at standard roll quantities for each denomination, making the process automatic.
Match the deposit slip to the reconciliation sheet. The total on your deposit slip should equal the counted total on your reconciliation sheet minus any cash retained for tomorrow's starting drawers. If these numbers don't match, find out why before sealing the deposit bag.
Deposit promptly. Cash sitting in your safe is cash at risk. Deposit the next business day at the latest. High-volume businesses should deposit daily. Don't let a weekend's worth of cash accumulate if you can avoid it.
#7. Track Variances Over Time
A single $5 shortage is noise. A $5 shortage on Register 3 every Thursday is a signal.
Keep a running variance log; a simple spreadsheet with columns for date, register, shift, variance amount, direction, who counted, and notes. Review it weekly or monthly and look for patterns.
- Same register, recurring shortage: Could be a mechanical issue with the register, a POS configuration error, or a pricing problem on a frequently sold item.
- Same shift or same employee, recurring shortage: Could be a training issue (transaction entry errors) or something that warrants a closer look.
- Random, small variances across all registers: Likely normal operational noise - minor transaction errors, rounding, customers leaving change. Document and monitor, but don't panic.
- Sudden large variance with no explanation: Investigate immediately. Recount the cash with a bill counter for machine-verified accuracy. Review POS transaction logs for voids, refunds, or unusual activity. Check camera footage from the counting area.
This log is also what auditors and accountants want to see. It demonstrates that your business actively monitors cash handling rather than discovering problems after the fact.
#8. Common Reconciliation Mistakes (And How to Avoid Them)
Here are some common mistakes you can make and how to avoid them:
- Counting before pulling the POS report. If you don't know the expected total before you count, there's no real reconciliation happening - just counting. Always pull the target number first.
- Forgetting to remove the starting drawer. This inflates your counted total and creates a false overage that masks real variances. Remove and set aside the opening amount before counting anything else.
- Single-person counts. One person counting alone means one person's word is the only record. Dual-custody isn't optional if you want defensible numbers.
- Rounding or ignoring small variances. Writing "$0" on the reconciliation sheet when the actual variance was -$2.47 defeats the purpose. Log the real number every time. Patterns only emerge from accurate data.
- Not documenting zero-variance nights. A clean count still gets a signed sheet and a printed receipt. Consistent documentation is what makes the process trustworthy over time - not just when something goes wrong.
- Counting fatigued. End-of-shift manual counting combines the worst conditions for accuracy: tired employees, repetitive tasks, and pressure to leave. A bill counter removes human fatigue from the equation entirely. The machine doesn't care what time it is.
- Missing counterfeits in the recount. If a drawer comes up short and you recount by hand, you'll get the same wrong number twice. A counterfeit bill in the stack creates a phantom shortage that no recount will resolve. Bill counters with built-in counterfeit-detection (UV, MG, IR) to catch fakes during the count. A standalone counterfeit detector at the register prevents them from inserting the counterfeit into the drawer in the first place.
Frequently Asked Questions
#1. How long should end-of-day reconciliation take?
With a bill counter and a structured procedure, reconciliation for a single register should take 10-15 minutes - including the count, POS comparison, documentation, and deposit prep. Manual counting stretches that to 30-45 minutes or more, especially when recounts are needed. Multi-register businesses should budget accordingly, though counting multiple drawers becomes faster once the process is routine.
#2. What's an acceptable cash variance?
There's no universal threshold, but most well-run cash businesses consider a +/- $5 per register per day to be within the normal operational range. Variances consistently above that suggest a procedural or personnel issue. Some businesses set tighter tolerances (e.g., +/- $2) in high-accountability environments. The important thing isn't the threshold itself - it's that you set one, document every variance, and investigate when the pattern exceeds it.
#3. Should I reconcile every register separately?
Yes. Combining multiple drawers into a single count masks the register from which the variance came. If Register 1 is $10 over and Register 2 is $10 short, a combined count shows zero variance - and you've missed two problems that cancel each other out. Count each drawer individually, document each one on its own reconciliation sheet, and track variances per register.
#4. What do I do if the count doesn't match after two attempts?
If two machine-verified counts produce the same number and it doesn't match the POS expected total, the issue is almost certainly not a counting error. At that point, review the POS transaction log for voids, refunds, discounts, or incorrectly entered amounts. Check whether non-cash tenders were properly accounted for. Verify the starting drawer amount was correct. If the variance remains unexplained, document it with full detail in the variance log and flag it for management review.
#5. Do I need a bill counter for reconciliation, or can I count by hand?
You can hand-count, but the tradeoffs are significant. Manual counting takes 3-5x longer, produces no printed verification, and carries a 1-3% error rate that makes it harder to trust your variance data. A bill counter provides a machine-verified total within minutes, along with a printed receipt that independently documents the count. For any business that counts more than a few hundred dollars per night, the accuracy, speed, and value of documentation from a counter more than justifies the investment.
Key Takeaways
End-of-day reconciliation is the process that turns your daily cash flow from a guess into a verified number. Done right, it takes 10-15 minutes per register, produces a signed and printed record of every count, and gives you an early-warning system for errors, counterfeits, and theft.
The fundamentals are simple: pull the POS report first, remove the starting drawer, count with a machine, compare the totals, document the variance, print the receipt, sign the sheet, and prep the deposit. Do it the same way, in the same order, every single night.
Track your variances over time. Patterns in the data tell you things that individual counts never will. And build the paper trail - reconciliation sheets, count receipts, deposit slips, variance logs - that connects your register to your safe to your bank statement without a single gap.
The businesses that close clean every night aren't the ones with perfect employees or perfect systems. They're the ones with a repeatable process and the discipline to follow it.
